Showing posts with label DIY. Show all posts

Saturday, February 20, 2010

Desk Chair Project - Part Two

Remember that chair I got at the estate sale for $2 I was working on re-upholstering? Well I have the bottom cushion finished after I took it apart and re-padded it (which was messier than I ever expected since the original cushion had completely disintegrated). I just pinned some fabric to the seat back for the photos, so I plan on centering that pattern better when I finished it.

I love the way it's looking! The wood on the base might need a little bit of attention, but once the back is finished I think it will be gorgeous!


PS: Still loving my Sea Pinks pumpkin pincushion. Thanks Jenny!

Wednesday, January 13, 2010

DIY - Vintage Plate Wall Clock

I finally got around to finishing some projects up today that I've been wanting to do for awhile. A couple years ago I got this vintage plate at a thrift store for 30 cents. I loved the folk inspired farm scene and lovely yellow color. I used it to hold keys in my dorm and decided I wanted to find a more useful purpose for it.

I got out my handy Dremmel and bought a ceramic and glass drill bit for it at Lowes for a couple dollars. Picked up a clock motion at Walmart for $6 and once I found the center of the plate it just took a few minutes of drilling and screwing the motion into place and voila! I have a wall clock! Here are a couple more photos:


If you have any questions regarding this project, feel free to post them and I would be happy to update with the answers.

Tuesday, January 12, 2010

Desk Chair Project - Part One

So I'm starting my journey on my first real upholstery project. In the past I have recovered chair cushions, simple new padding, cover and staple projects. This time I decided to try something a little more advance. I'm getting a pile of books out of the library and I think the office chair I got from the estate sale will be the perfect simple job to practice on.

This morning I bought yardage of Amy Bulter's Primrose in grey from her Nigella line (which is a medium weight decor fabric) and I'm waiting for a good sale to buy padding from Joanne's. I think the fabric will look really beautiful with the wood base and seat back.


I'm pretty excited. I hope it works out and I have a feeling it will take awhile to finish (I'll wait weeks for the right price on the padding) but I'll keep you posted on the progress. Anyone out there do any upholstering? Share you tips and projects!

Monday, January 11, 2010

Estate Sale Treasures - Part One

This weekend Jared and I hit up another estate sale on Saturday and got some fantastic deals. I figured I would share them today in a series of posts.

The first one is this amazing office chair. I am currently using a $12 Ikea desk chair that I got in college and is just about on it's last leg. We found Jared's amazing mid-century chrome and orange velor desk chair at an estate sale and have been on the hunt for one for me. We found this one this weekend for (wait for it....) $2! I love the chunky solid wood base and giant screw. It needs to be reupholstered and new padding (which I plan on doing myself) but it's in great condition otherwise. It looks to have been owned by someone named Alice at some point. I think I'll leave the label right where it is.


More estate sale finds coming throughout the day! We really made out well this weekend.

Friday, November 13, 2009

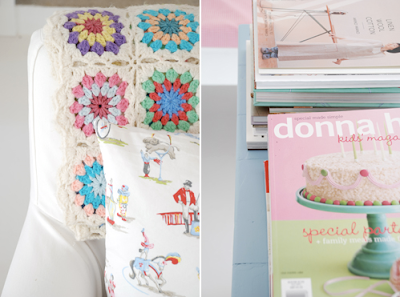
I want to learn to crochet for two reasons.

(Photos from Yvestown Blog.)

First I'm tempted by those adorable amigurumi animals I'm seeing everywhere right now. We just bought a giraffe for our niece. I was looking at amigurumi books last night on amazon and when I wake up this morning and check my feed I find this tutorial from Yvestown. It's a sign. I hear if you are bad a knitting, crocheting comes easier. Any personal experiences? Tips?

Wednesday, November 11, 2009

DIY Results - Felt Rosette Pillow

So I finished my felt rosette pillow I mentioned yesterday. It was very time consuming, and I ended up making the rosettes a bit more dense (probably used more like 80 circles instead of 60) but I love how it turned out. It was a nice project to do in front of the TV since it was so repetitive. I also added a pillow sham overlapped back instead of a zipper. I can't wait to put it on the lounge chair in my new studio. I may save this idea for a gift this Christmas for someone.

It probably took about 5 hours total and I worked at a leisure pace. I used vintage felt from an estate sale so the whole project cost me maybe $2.50 (including the DIY pillow form).

The tutorial can be found here and check out Kathleen from Twig's & Thistle's version here. If you give it a try I would LOVE to see how yours turn out!


I also didn't have a pillow form this size handy so I made one out of an old sheet and some stuffing. It turned out just as cute! Since the felt is so thick you can use a pattern underneath and it doesn't show through.

Tuesday, November 10, 2009

Today's Project: Felt Rosette Pillow

I saw this tutorial from Anne Kyrrö Quinn on Etsy's Storque awhile ago. It's a project featured in her fabulous book Felt Furnishings. I thought it was so beautiful and this morning when I woke up and check my feed I saw Kathleen of Twigs & Thistle's version and was inspired to give it a go myself. I happened to pick up a box of vintage felt at an estate sale a few weeks ago and just pulled out a lovely buttery yellow that will go beautifully with my new lamps I picked up this weekend. I think I'll modify it to be a sham rather than a zippered cover and I'm considering backing it with a pretty print.

I'll make sure to post photos when I finish! I've already got half of the rosettes cut out and hope to have those sewn on by the end of the day. I'll need to pick up a pillow form next weekend.

Thursday, July 30, 2009

DIY Update: Lounge Pillows

Just another DIY project update. I had extra fabric from the photobooth backdrop so I threw together a few pillow shams (one embroidered and one with the green fabric on the front). There are going to be some adirondack chairs in the yard in front of the beach so I think these pillow will be really cute on the chairs and make it feel a little loungier.


I did in fact finish the napkins (throwing my back out in the process from hunching over a sewing machine all weekend) and they turned out really cute. I'm working on finishing the bunting this afternoon as well as some shoe bags for my girls and some table runners with the rest of my extra fabric.

My dress fitting is saturday, make-up and hair trial on Thursday and other finalization meetings next week. I also found out my SUPER talented step-brother and his girlfriend will be doing the music for our ceremony. It will be acoustic guitar and harmonica. I'm so excited. More updates coming soon.

Tuesday, July 28, 2009

Out of Town Bags

Jared and I were at a local Cleveland craft store and happened upon a bin of nice organic cotton canvas bags for under $2 a piece. We snagged all of them (about 16) and took them home. We spent an evening sketching out a design together. It was important to me that it would be a design that people would actually want to use after the wedding (as opposed to our monogram or wedding date) so we went a long with our bird theme and came up with a pair of birds hanging out on a Peony bush.

I took silk screening in college and Jared has dabbled with it a little as well so it was pretty easy for me to paint this thing into a screen and print them all in an afternoon. I love the way they came out and I think they will be so cute as beach bags for our guests. I hope there is one left for me after we fill them all for guests.

Wednesday, July 22, 2009

Our Napkins.

Just wanted to show you the finished product of our DIY napkins. We still have about a third to go, but thanks to the help of Jared's amazing mother and her sewing machine they are turning out beautifully. They will add so much color and pattern to our tables. All the fabrics were purchased from etsy suppliers on sale and cut and sewn by my future mother in law and myself. We will be encouraging our guests to take them home and what we are left with we will keep and maybe make a small quilt out of.


I had some fabric left over so I bought some cotton rope and threw together some simple bunting for the either the breezeway or the staircase down to the beach. I think it turned out really cute. I'll need to starch them when I get out to Portland so they hang nice and flat but it was super easy to make and cost me about $6 for 25 feet.


I've become a DIY addict lately. If you have any questions about how we did any of these, feel free to contact me and I can give you a hand.

<3

Thursday, June 11, 2009

Envelope Liners - Easy way to spruce up your invitations

Looking for a way to take your invites to the next level cheaply and easily? Envelope liners are my newest obsession. They are cheap and relatively easy for a DIY beginner or veteran. It is a little time consuming, but not too bad. It's something you can do in front of the TV. Forgive me, these photos were taken before they were glued in.

We recived our beautiful goccoed invitations from Ugly Kitty last week and we adore them, but I just wanted to do something extra to make them a little more special. I remembered a tutorial I saw on Annie Get Your Glue Gun some months ago and headed to the book sale at our local library. As if it was fate, we found an old bird guide from 1918 that was oversized and falling apart. We bought it for $1 and I took it home and disected it. I followed Annie's tutorial to creat the template and after that it was smooth sailing. Added a little bakers twine in brown to hold all the bits and pieces together as well (super cheap, 10 yards for $7 on etsy).

Hope that helps some of you a little. I'm so excited to send out our invites. We couldn't be more pleased with how they turned out. I hope our guests appriciate the love that went into them. Have a lovely day everyone! Happy planning!